 My summer veggie garden got off to a slow start this year--I just didn't get the plants going as early as I usually do. While everyone else has been enjoying fresh tomatoes and peppers from their gardens, I've been waiting and waiting for mine. But I have veggies now and plenty more on the way. There is just nothing in the world like the taste of fresh vegetables, still warm from the sun.
Tuesday, July 30, 2013
Finally . . .
My summer veggie garden got off to a slow start this year--I just didn't get the plants going as early as I usually do. While everyone else has been enjoying fresh tomatoes and peppers from their gardens, I've been waiting and waiting for mine. But I have veggies now and plenty more on the way. There is just nothing in the world like the taste of fresh vegetables, still warm from the sun.
Sunday, July 28, 2013
Exotic tree in my garden

Thursday, July 25, 2013
Morticia moment
 The sun is shining on my garden this morning. After two days of rain, the flowers will be bursting with new blooms. That means it is a good idea to deadhead the old blooms. Deadheading prevents a plant from producing seed, encouraging it to put out more blooms. I cannot deadhead my garden without fond memories of Morticia Addams. Deadheading is my Morticia moment.
Monday, July 22, 2013
Pulling privet
It is difficult to imagine that when we moved here just over 20 years ago, I didn't even know that privet existed. There were some odd looking "trees" on our new property but I had no idea that they were just huge weeds.
Within the first year, we hired a friend to cut down the big privets but sadly, they grew right back, AND sprouted lots of baby privets.
Over time, my battle with the privet has taken many forms. In the last couple of years, I have dedicated one day each winter to pull and prune the privet that grows in the ditches bordering our yard. Eliminating the larger, seed-producing shrubs has significantly reduced the number of random sprouts appearing in my gardens and yard.
However, there are several patches of thick privet growth taking over our "lawn." My husband keeps them mowed but the privet seems to enjoy the "pruning" and has developed such thick stems that walking barefoot in those spaces is like stepping on sharp spikes.
I have finally acknowledged that pulling the privet in our yard must be added to my "to-do" list of projects. Today seemed like a good day--the soil is moist from our abundant rain, my garden projects are more or less
caught up, and it is a relatively cool day for July. I worked for four hours and pulled up 3 1/2 five gallon pails of privet in the worst section of the yard. The "pulling the privet" project has begun!
Within the first year, we hired a friend to cut down the big privets but sadly, they grew right back, AND sprouted lots of baby privets.
Over time, my battle with the privet has taken many forms. In the last couple of years, I have dedicated one day each winter to pull and prune the privet that grows in the ditches bordering our yard. Eliminating the larger, seed-producing shrubs has significantly reduced the number of random sprouts appearing in my gardens and yard.
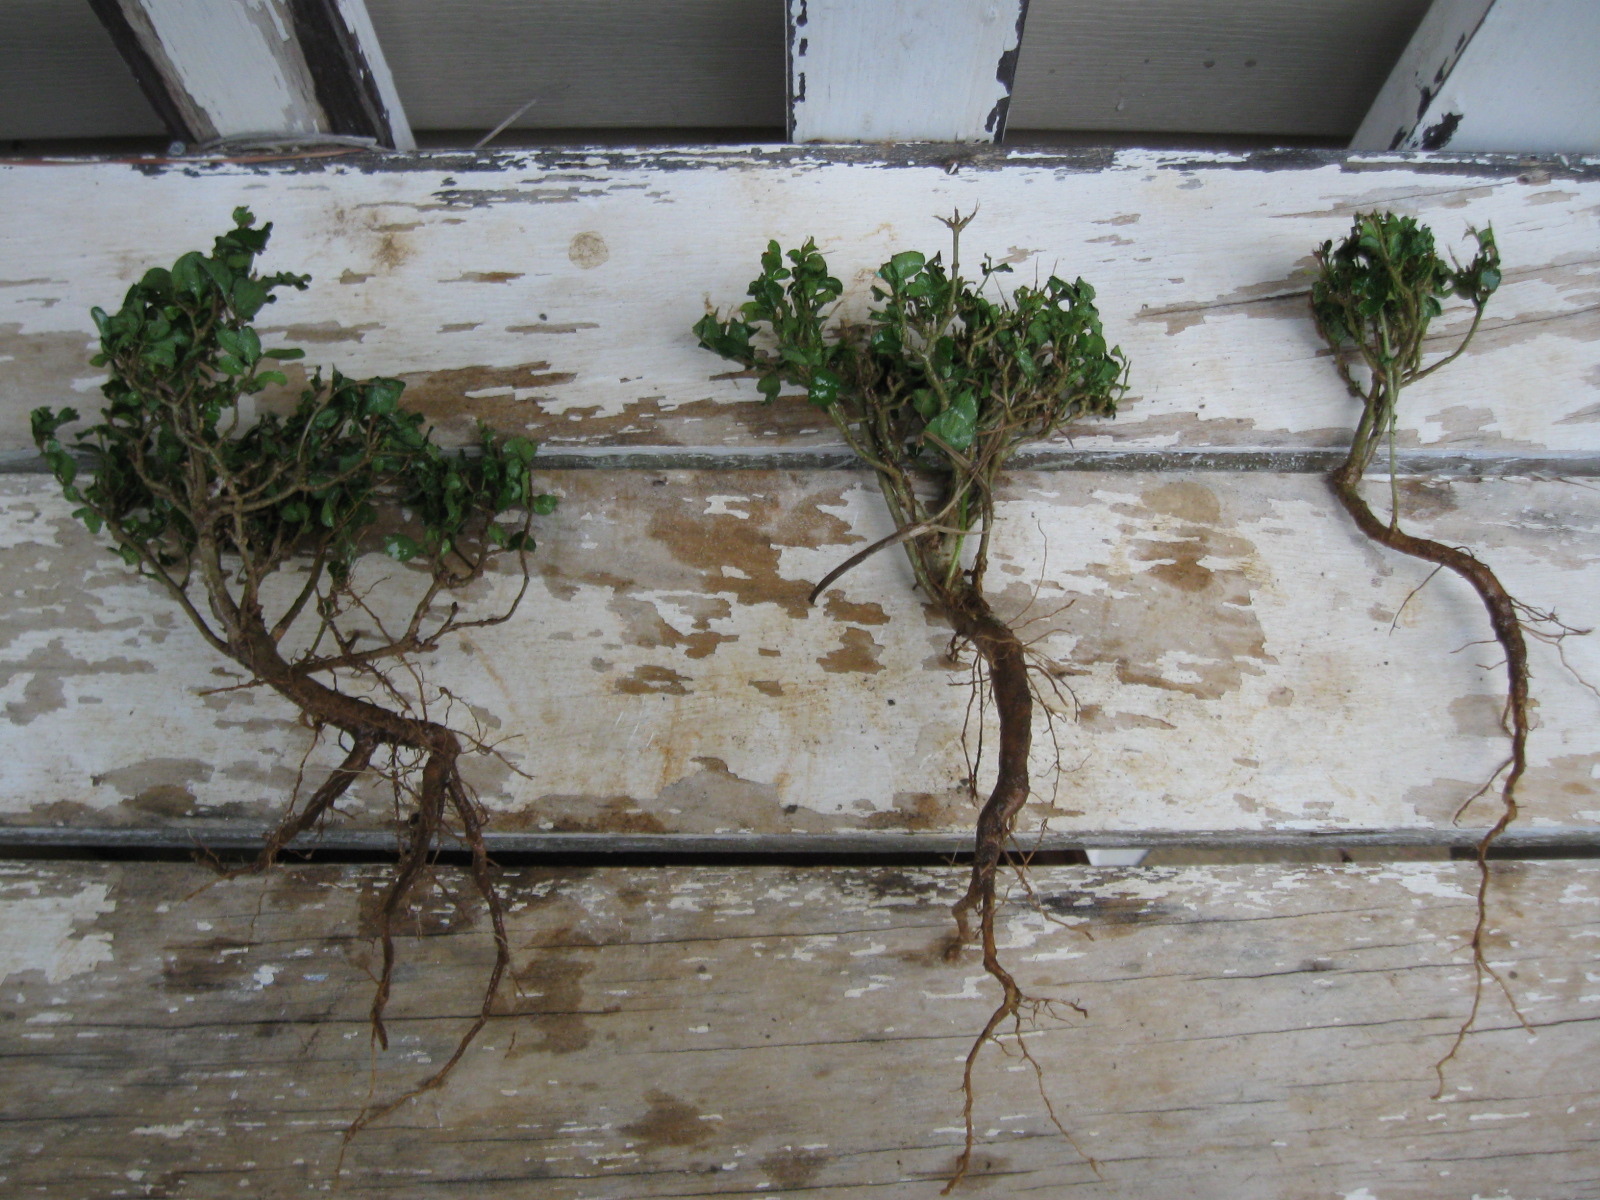 |
| Yard privet--the roots are deep and the stems are thick. |
I have finally acknowledged that pulling the privet in our yard must be added to my "to-do" list of projects. Today seemed like a good day--the soil is moist from our abundant rain, my garden projects are more or less
caught up, and it is a relatively cool day for July. I worked for four hours and pulled up 3 1/2 five gallon pails of privet in the worst section of the yard. The "pulling the privet" project has begun!
Sunday, July 21, 2013
Ferns again
On Saturday morning, we took our horses to ride on a farm in Chilton county. As we rode through the woods and along Yellow Leaf Creek, I was able to identify nine native fern species. I have eight of the nine growing in my own gardens. It was fantastic to see them growing in their natural habitat.
Friday, July 19, 2013
The truth about my dahlias

 Before writing this blog post, I decided to do a little research on these flowers so that I would be totally accurate in my description of them.
Much to my surprise, I discovered that everything I have learned about my flowers through experience directly contradicts what I found to be published about them.
Dahlias are supposed to need lots of water--mine have thrived through drought conditions.
 Dahlias are supposed to be heavy feeders--mine don't seem to care whether they get fertilized or not (other than the usual scoop of compost I give them when I transplant them in the spring.
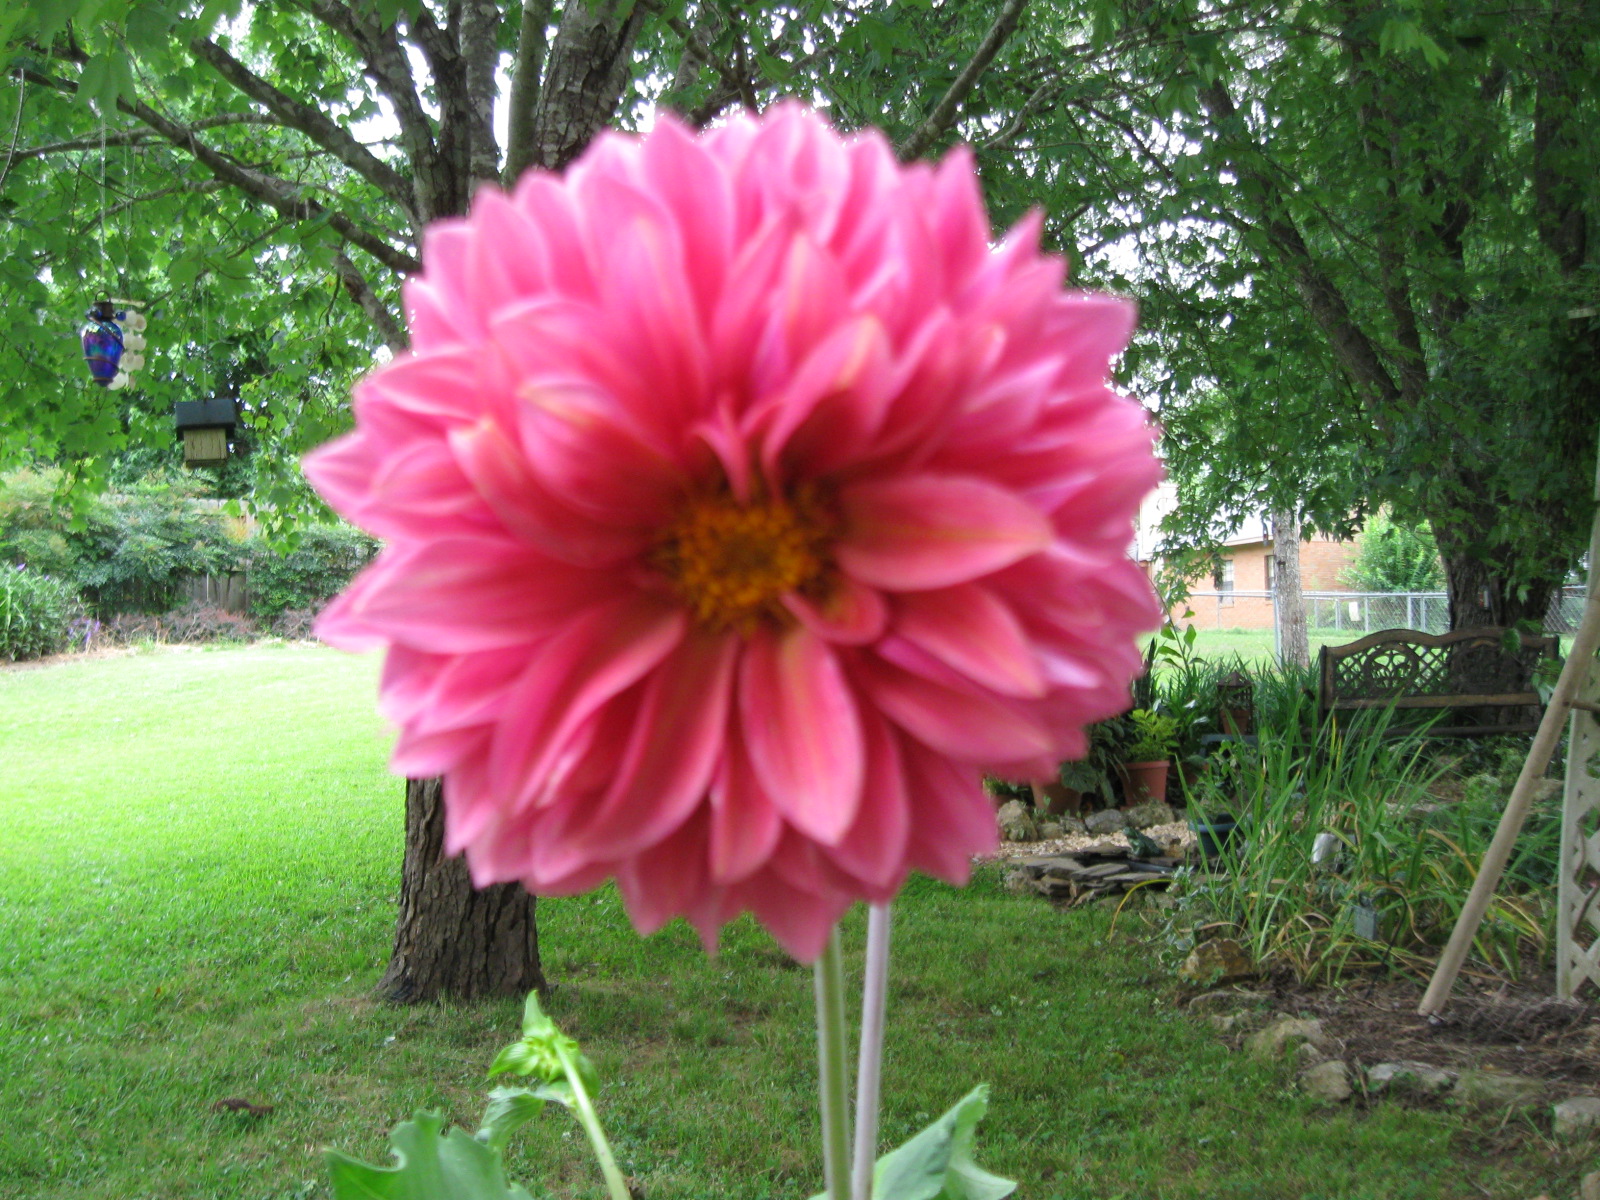 Dahlias are supposed to need to be staked to support the larger bloom stems--I have never needed to stake my dahlias.
Dahlias are supposed to like full sun--mine thrive even in deep shade.
Dahlias are supposed to have well-draining soil--although my soil is amended, I've also planted them in soggy clay.
Dahlias from seed are strictly annuals--most of them are perennials in my garden.
The only dahlia fact that seems to be true in my garden is the unpredictable nature of the seed-grown variety. It is true, that I never know quite what will grow from my dahlia seeds. Some plants are compact and bushy, some are tall and leggy, some are bright green and others have a burgundy color to the foliage. The flowers can be pink, red, peach, white, or some combination. They can be single petals or so dense that you can't see the center, or any variation of petal type.
Every dahlia is a delightful surprise!
Tuesday, July 16, 2013
Poor purple coneflowers
 Something is eating the petals of my purple coneflowers. There is evidence of some chewing on the leaves too, but most of the damage is on the petals. I've watched diligently but have not been able to observe the culprit. There is no point to randomly applying product unless I know what I'm trying to beat off. The bees still enjoy the cones so I guess I'll just keep watching. Any suggestions?
Sunday, July 14, 2013
Ferns on Friday
On Friday, I was privileged to attend a presentation on Shelby County (Alabama) ferns by Sarah Johnston from the Birmingham Fern Society. Much to my amazement I learned that we have 31 officially documented fern species just in our county and there are probably more that haven't been officially counted yet. I also learned that ferns have an entirely different vocabulary from other plants. For instance, ferns don't have a stem, they have a "stipe," they don't have leaves, they have "pinna."
I love growing ferns in my garden. After attending this presentation I went out to count my fern species. I have 18 different varieties, 9 of which are natives, and a few that I don't really even know what they are (I learned from Ms. Johnston that it is sometimes difficult even for experts to identify a specific fern).
Here are a few photos of my ferns. Apologies to the experts (and my ferns) if I have mis-identified them.
 |
| Resurrection fern--native |
 |
| Bracken fern--native |
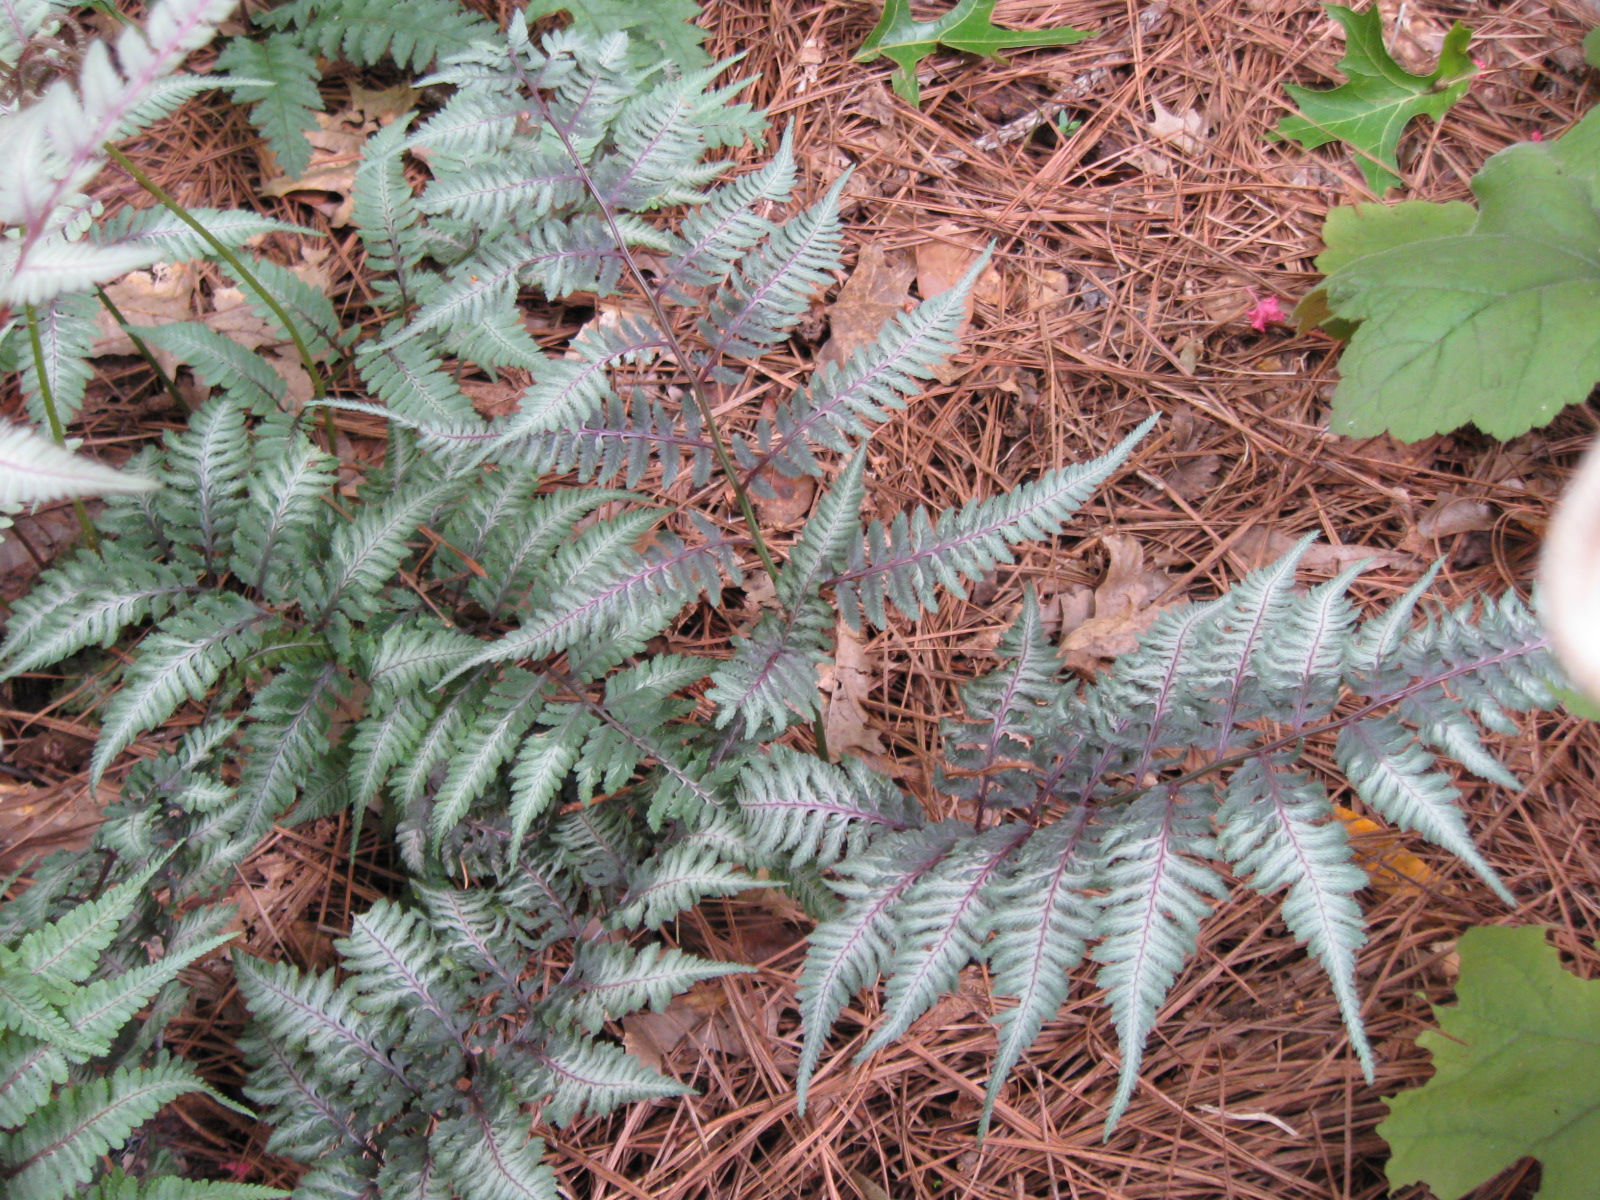 | |
| Japanese painted fern |
 |
| Christmas fern--native |
 |
| Southern lady fern--native |
 |
| Sensitive fern--native |
 |
| Southern maidenhair--native |
Thursday, July 11, 2013
Tea time
 |
| The tea is ready! |
The first step is to strain the tea to a purely liquid form. I use a small coffee strainer that I picked up at a yard sale but a piece of cotton fabric works well too.
Even this strained form is too intense for most plants so it needs to be diluted. I like to mix 3 parts rain water to 1 part compost tea.
 |
| Straining the tea |
I use most of my tea as a foliar spray. I purchased a garden sprayer this summer so I can spray all my gardens in about one hour. I like to spray in the morning when the stomata are wide open for maximum absorption of the the microbes.
Through trial and error, I've learned a few things about compost tea as a foliar spray. There are some plants in my garden that don't need fertilizing (nandina, mint, vinca major). There are some plants that don't want to be fertilized (oak leaf hydrangea). Roses love the fertilizer but the foliar version tends to burn the buds, producing brown spots on the blooms.
So, a second use for compost tea is as a root-applied fertilizer. I still dilute it but don't know if I need to do so. I use the the root application on the roses and on any plant that is currently producing ripening fruit. I don't know that this is necessary either as the tea is sanitary but I'm concerned with the strong-smelling tea affecting the flavor of the fruit/veggies.
Finally, I take the dregs of the compost tea and dump it back onto the compost heap. The microbes in the tea seem to speed up the composting process.
I brew tea approximately every 10 days during the summer. Tea anyone?
Wednesday, July 10, 2013
Oops
 Sometimes things just don't work out like I plan them. I saw instructions for this darling little moss garden on the internet. Doesn't it look cute? What I didn't think through properly was the issue of drainage. The instructions called for creating the garden in a clay tray (no hole). The very first night after I made the garden, we got an inch of rain, which turned my little moss garden into a moss swamp! The reality of the moss garden is that it must be a house plant. It is now the centerpiece for my kitchen table--not what I was planning at all.
Tuesday, July 9, 2013
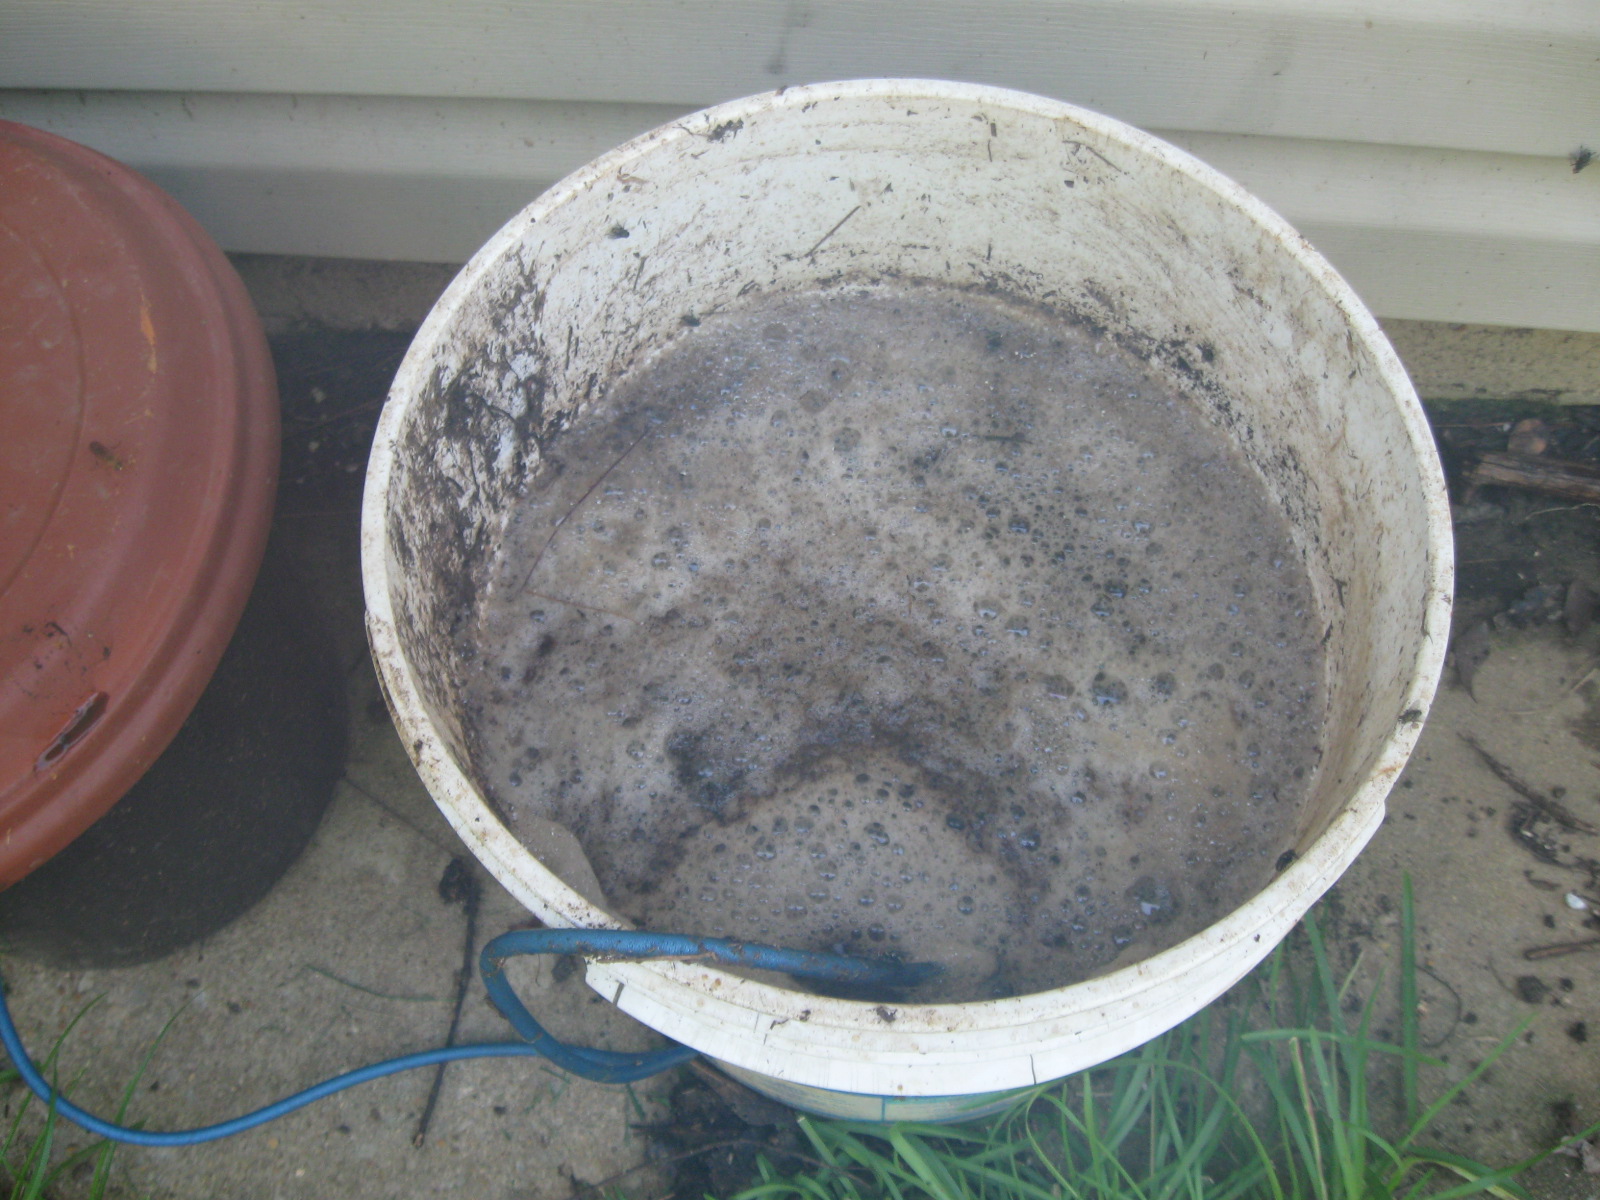
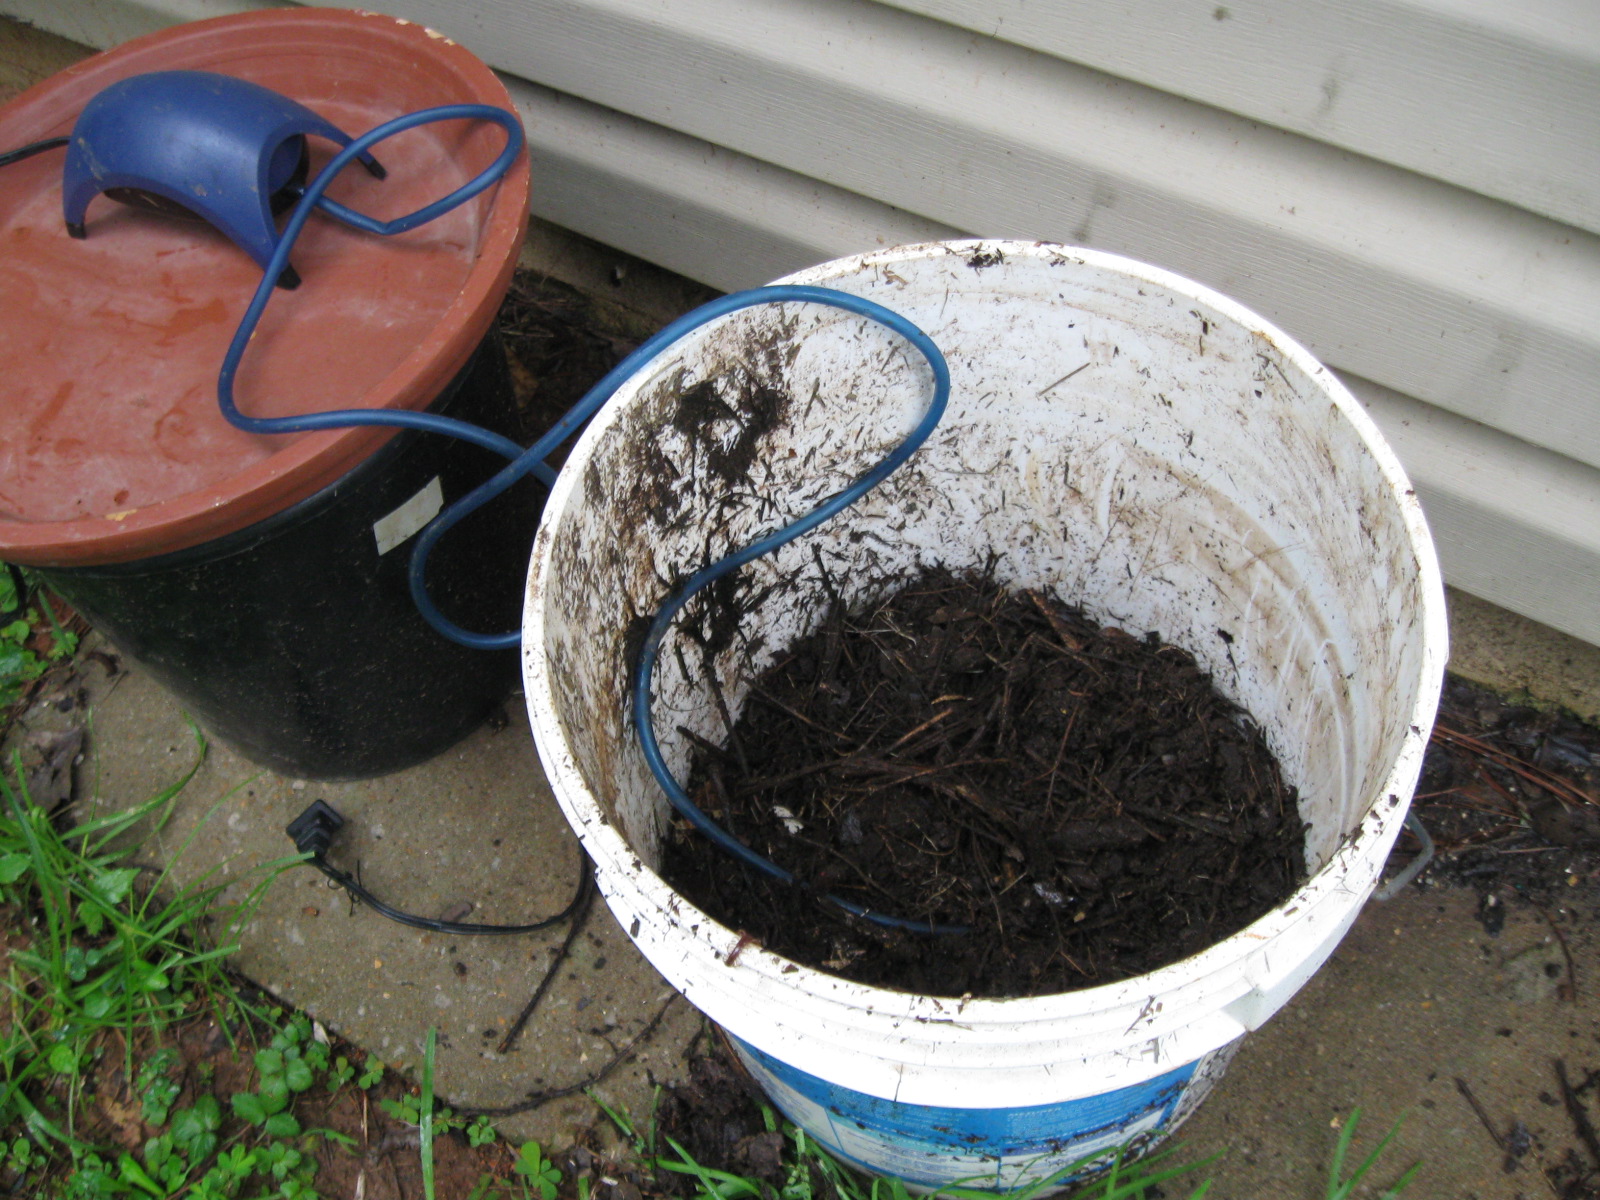
The tea is brewing
 |
| Equipment for compost tea |
To brew a batch of compost tea, you need some inexpensive equipment: a 5-gallon bucket and a small aquarium motor with tubing and bubbling stone.
Here is the recipe:
 | |
| Fill bucket 1/3 full of compost |
1/3 bucket of mature compost
2-3 Tablespoons of sweetener (I like molasses)
2/3 bucket of rain water (or let hose water sit for a couple days to evaporate off the city chemicals)
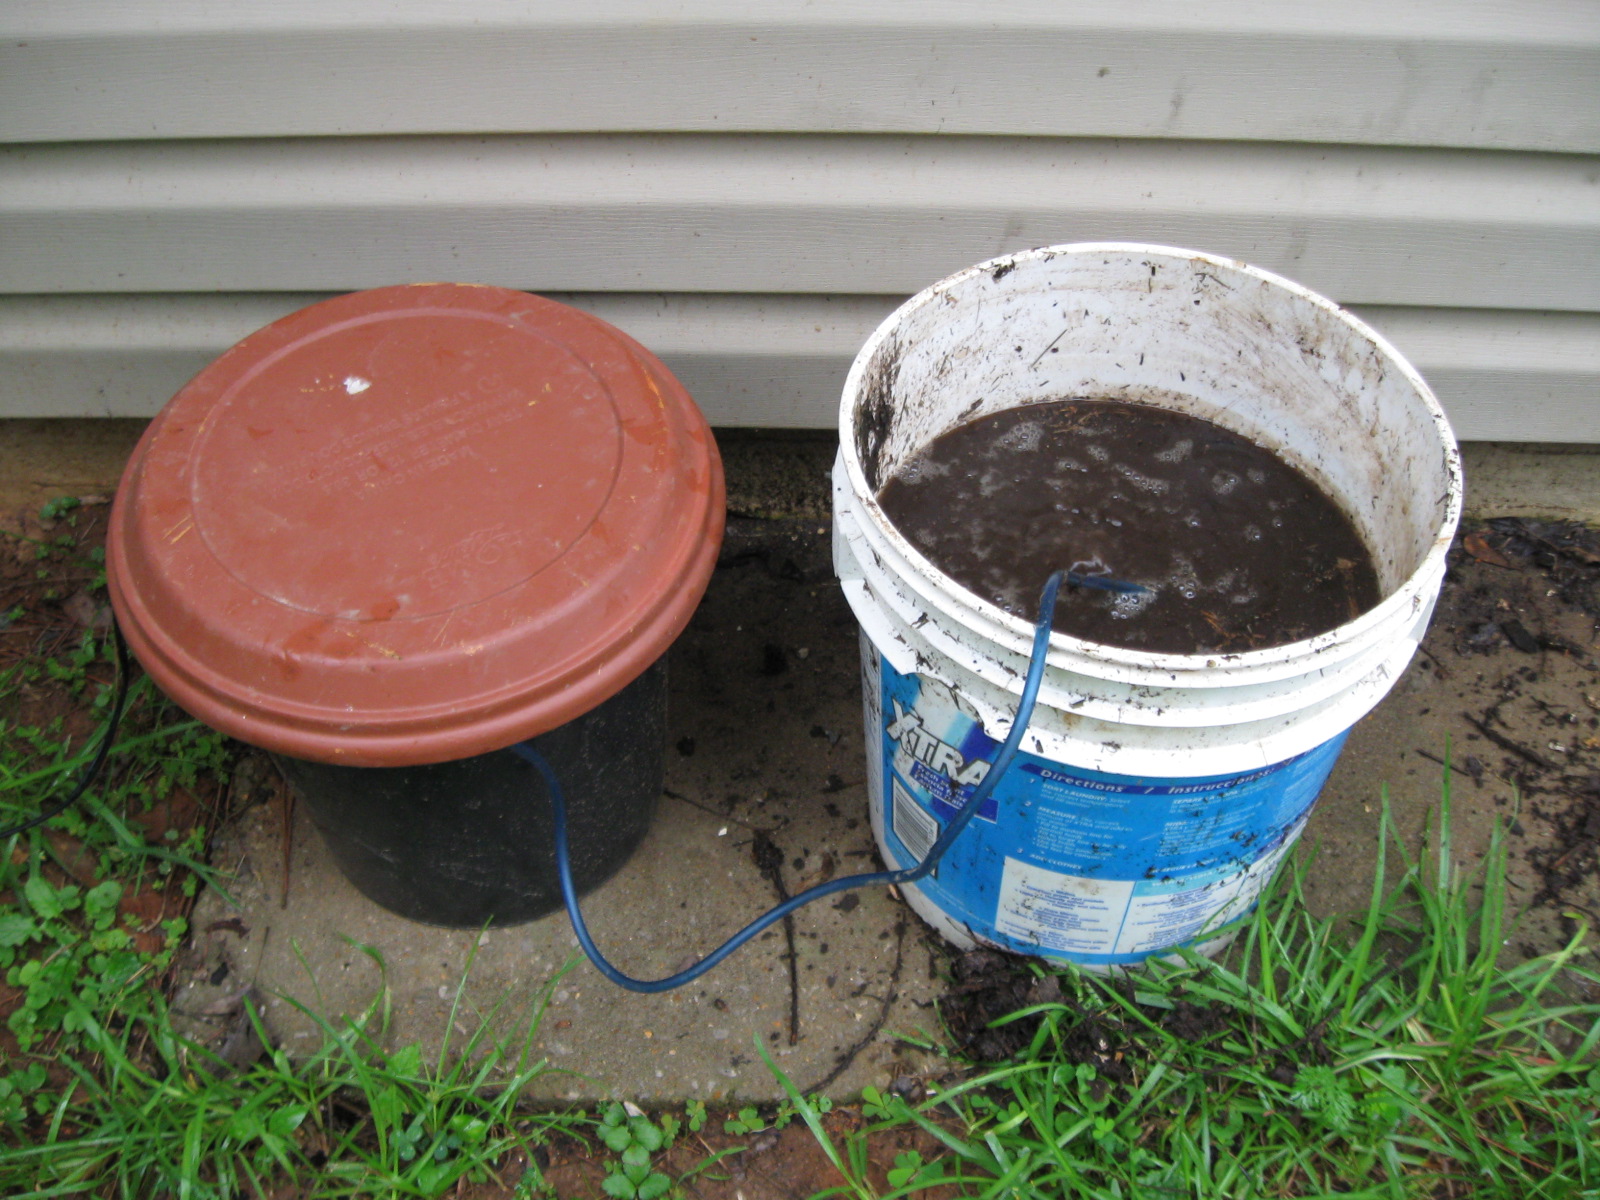 | |
| Brewing compost tea |
I put the aquarium motor in the bucket with a lid to protect it from the weather since I brew my tea outdoors.
When the compost tea is ready, I use it in a couple of different ways--I'll share that when my tea is brewed.
Sunday, July 7, 2013
Meet my gardening partners
 Meet Magic and Cheyenne, pictured here with their "mama," Emily (my daughter). Magic, Cheyenne, and their barn buddies keep my gardens enriched with an endless supply of compost. In my backyard, the soil contains a great deal of limestone and clay (read: concrete) so amending the soil is critical to my gardening efforts.
Yes, I get a few weed seeds but no more than are naturally in the soil. I also use plenty of organic mulch to suppress the weeds.
If you are not blessed to board some horses, you can still find free compost. Contact a horse boarding facility near your home. They will gladly allow you to haul away some of their never-ending compost pile.
What you need to know about horse manure compost: it is composed almost entirely of grass/grain so it breaks down into compost very quickly, usually within 2-3
months. You will know it is ready for use in your garden when it looks/smells like soil. When collecting compost, always dig from the lower levels of a "manure" pile to make sure you are getting the the most mature product.
Saturday, July 6, 2013
Welcome
Welcome to my garden. I will be sharing my photos and experiences as I continue to learn about the plants growing here.
Subscribe to:
Posts (Atom)